


Let me just say...
I am SOOOO excited to share this one with you!

I know you want to make them! So here is the tutorial!

Supplies Needed:
- Vanilla Ice Cream (note, I used frozen yogurt.. I think regular ice cream would have been a better choice)
- 1 Pkg Green Candy Melts
- Ice Cream Cones (I used the colored cones)
- Black Decorating Frosting
- Vanilla Frosting
- Food Coloring, red and yellow
- Gum, in the little rectangles, not sticks
- Cocktail Cherries
- Rainbow Decorating Sprinkles OR Mini Chocolate Chips (for eyes)
- Cake Decorating Shamrocks (optional)
- Toothpicks, broken in half
Directions:
Ok... so you have a choice. You can go the easy, less messy, less work, less expensive route and simply use the green ice cream cones that you can buy at the store. If you choose to do it this way, skip down to Step 4.
OR... you can use any color ice cream cone, melt your green candy melts, and make your little leprechaun hat green that way. The choice is yours. Here is the more messy, more work, more expensive, but super fun way! Follow from Step 1 below, if you're up for it!
Step 1
Prepare your cones. I found that it worked well to line a baking sheet with wax paper. I placed my cones on top of a cooling rack set inside of the lined baking sheet.

Step 2
Melt your chocolate melts according to the package instructions. I used an entire package of melts to cover 8 cones. Be careful not to over cook your chocolate!

Step 3
Using a spoon, pour the melted chocolate over each cone, allowing it to drip down and cover the sides.

After pouring chocolate on the top of each, I found it helpful to pour chocolate around the perimeter, then fill in spots where needed.

Maker sure your cones are completely covered with chocolate, and allow them to set until the chocolate has hardened.

Step 4
Time to add a black band on your Leprechaun hats. I would have used this tip if it had fit onto the frosting bottle. This was not the case. Ugh! So, I had to resort to a Ziploc bag.

I squeezed a bunch of the frosting into a Ziploc bag, and snipped the end.

Add a band of black frosting around each of your hats. Here, you see the green colored cone (not covered in chocolate).

Add a little black frosting to the middle of a piece of gum, and stick it onto your hat. Voilà! You have a Leprechaun hat!

And here you see some finished hats that were covered in the chocolate.

Step 5
Some important notes to the rest of the instructions.
For the best results, work fast and work COLD! The colder you can keep your ice cream, the better. If you have a deep freeze, even better! It will keep your ice cream colder than a regular refrigerator. Of course... I did not have that as an option. Also, if you can manage to keep each Leprechaun on an individual dish, this would make it so much easier as well. That way you don't need to handle them more than necessary, and can take one out at a time.
Keep a cup of warm water ready. This will allow you to mold your ice cream balls and keep the ice cream from sticking to your spoons.
Using two spoons (one of mine was an ice cream scoop), make an ice cream cone sized ball of ice cream, trying to smooth it as best you can.
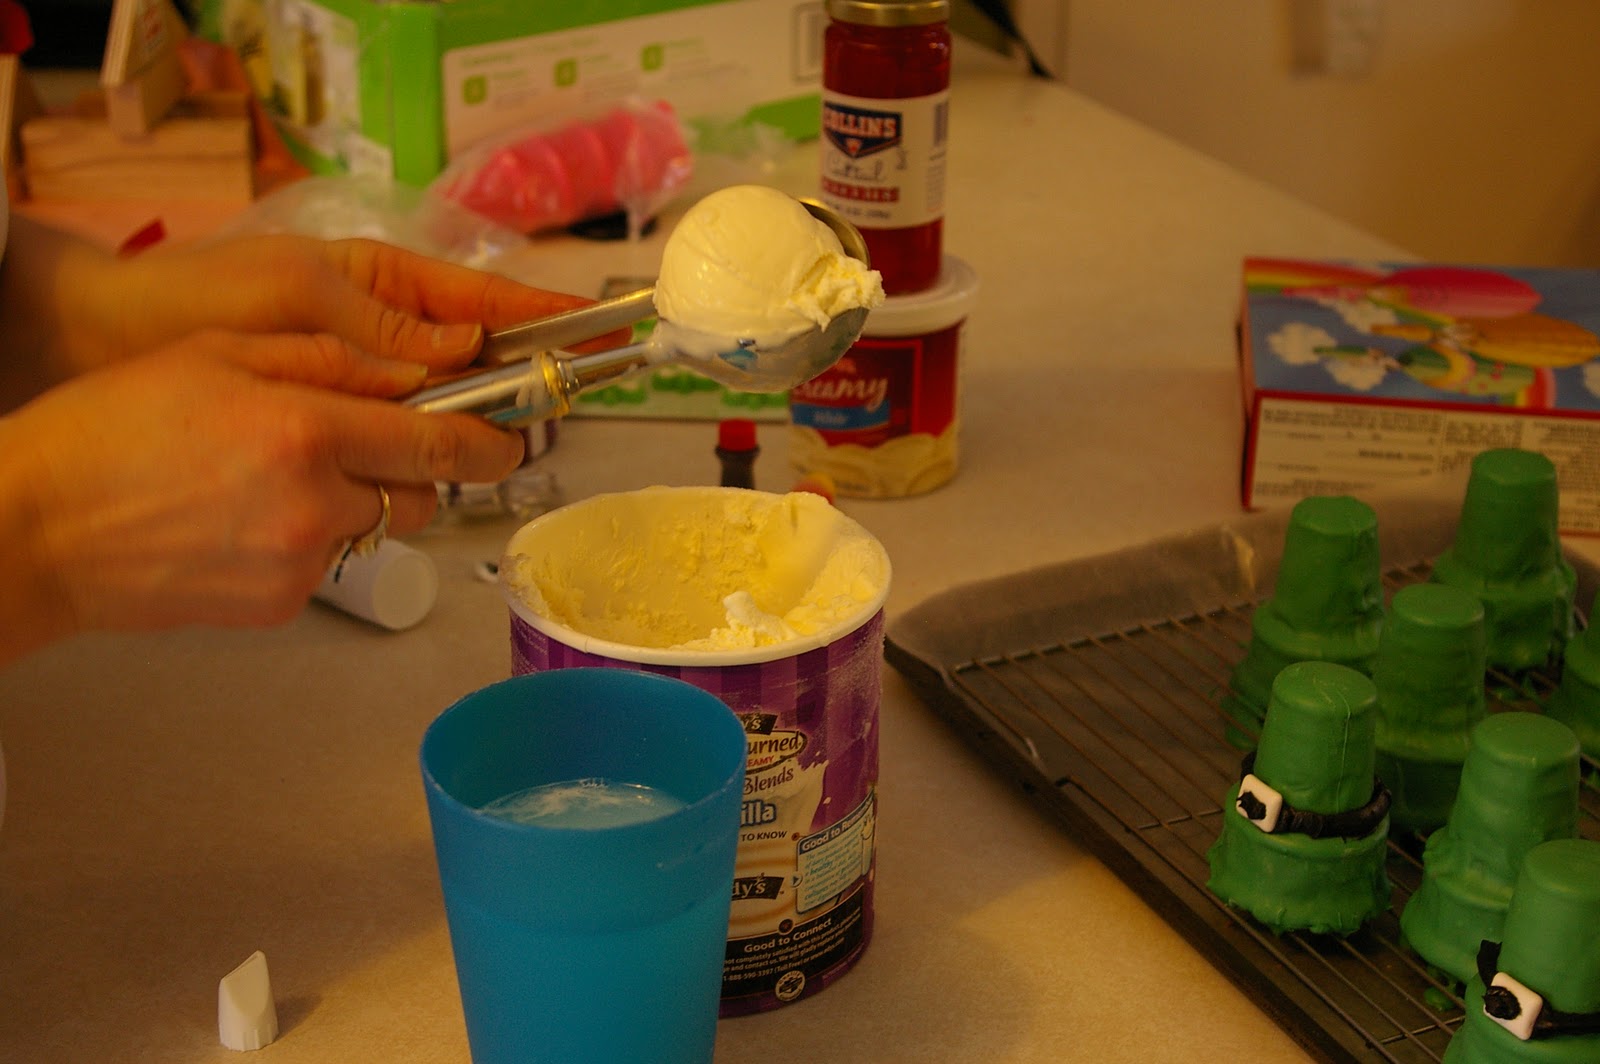
Add your ice cream ball to your Leprechaun hat, using the nicest side for the face.
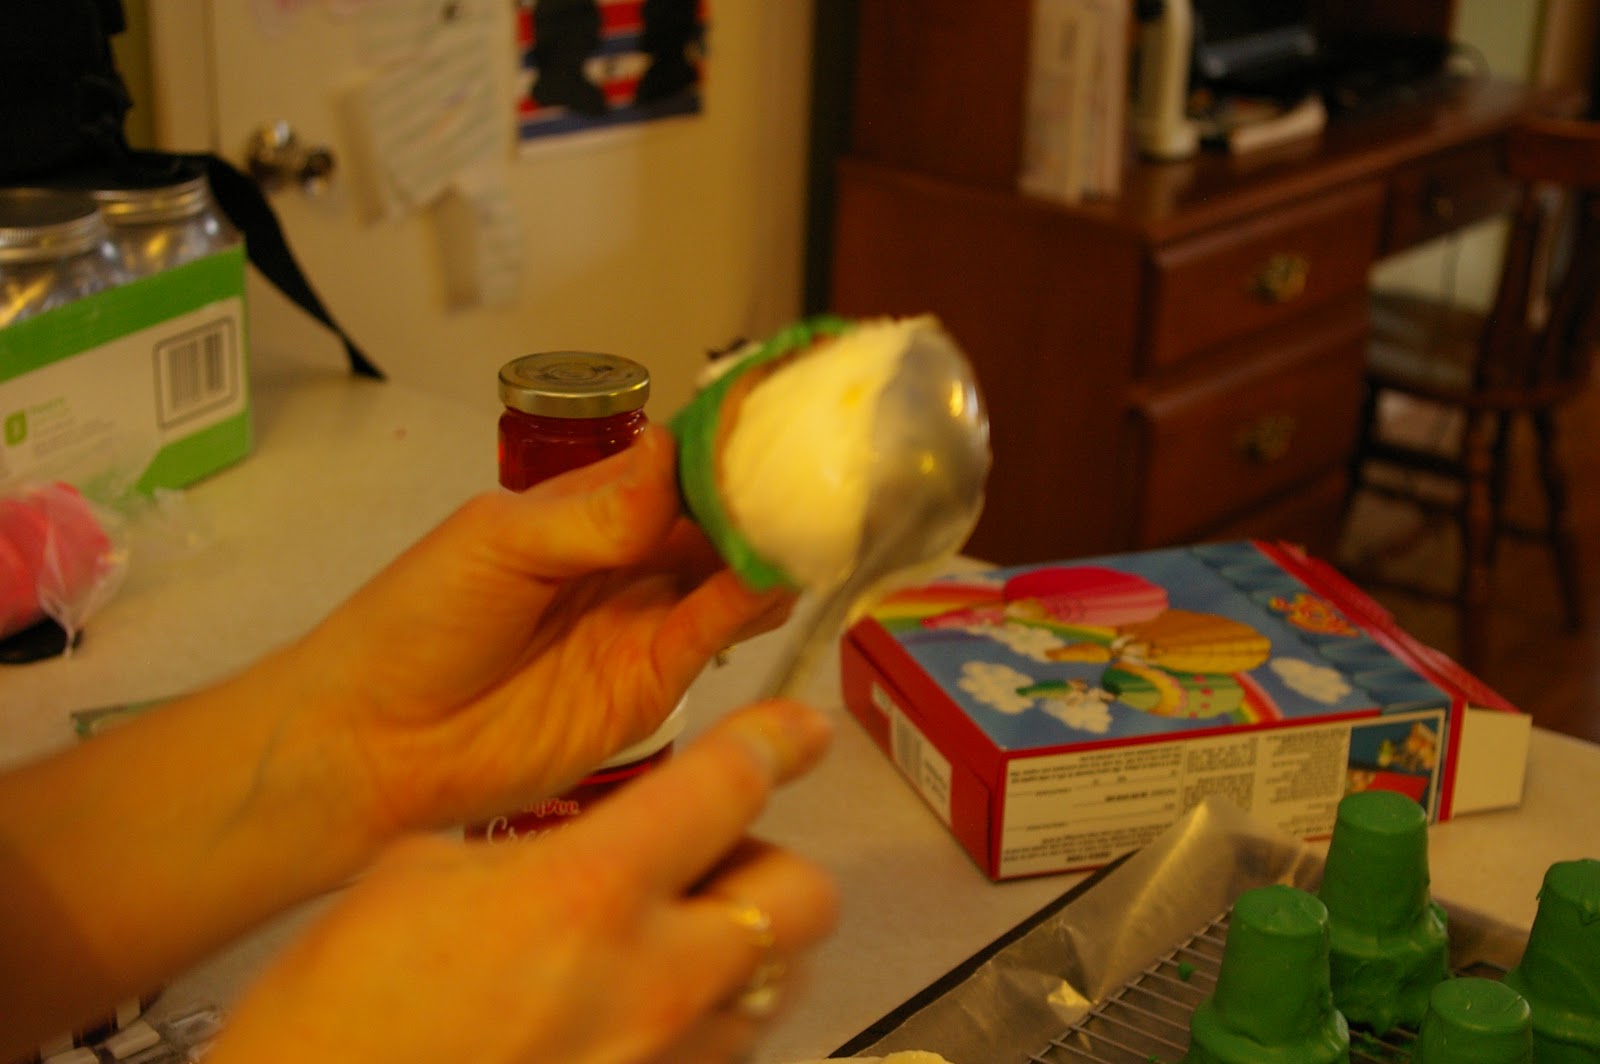
Place it on a tray and immediately place it in the freezer.


Here are my Leprechauns, freezing up as I work on the next...

I would recommend allowing your Leprechauns to freeze for an hour at this point. The more solid your ice cream is for the next step, the easier they will be to complete, and the better results you will get.
Step 6
I used store-bought frosting. You could just as easily make your own decorating frosting. I ended up adding some powdered sugar to this after the fact, finding that it worked a little better. You may want to do the same.
Tint your frosting to get an orange color that you are happy with. I used a 2:1 ratio of yellow to red dye. With the regular food coloring, I used 30 drops of yellow and 15 drops of red.


Add your orange frosting to a piping bag with a large circle tip, or to a Ziploc bag like I have, and cut the corner.

Step 7
Again, if you can, work with one Leprechaun at a time, that way your ice cream doesn't get too soft. Using your orange frosting, make a beard by squirting dots of frosting, or by squeezing zig-zags.

I would have added hair all around, but my ice cream was getting soft pretty fast (1 - I was using frozen yogurt, and 2 - I didn't allow it to completely freeze before this step... Ack!). You may want to add hair to yours too.
After the beard, I added some bushy eyebrows. Aren't they cute?!

Step 8
Time for the nose!!! Cut your cocktail cherries in half. I placed them cut-side down onto a paper towel to suck up some of the extra juice.


You could attach these with more frosting. I opted for breaking a toothpick in half, and using the toothpick to secure the nose to the ice cream. If you are giving these to young children, you likely would want to use frosting or make sure the toothpick is removed before the little ones get them!

Add your eyes! Actually, this would have been easier had I added them before the nose. The little candy sprinkles aren't the easiest to handle. You could also use mini chocolate chips, poking the pointy end into the ice cream. I first tried to make frosting dots for eyes, but wasn't happy with the results (I needed a smaller tip, or they would have been fine). It is up to you!

Step 10
Last, I added some frosting to the back of this candy shamrock, and attached it to the hat. And your ice cream Leprechaun is complete! Leave it in the freezer until ready to enjoy!
I can't wait to share these with my kids tonight. They will be a special treat, for sure.
Happy St. Patrick's Day!! Enjoy!


No comments:
Post a Comment